
If your customer wants to create an instantly bright, green lawn in their garden without the hassle of seeding their own grass from scratch, laying turf rolls is a great time-efficient and long-lasting alternative. Turf is pre-grown grass that’s been cut into rolls, with a layer of topsoil underneath – it can be laid just like a carpet onto the ground in your customer’s garden to either create a brand-new lawn or revive an older one that’s patchy or struggling to grow.
The process of a turf lawn installation is easy and straightforward – simply roll out the turf, install it and wait for it to take root. You can lay turf any time of the year so long as the temperature isn’t below freezing, but the best time to lay turf is either during autumn or spring, when the ground is moist, warm and neither waterlogged nor dried out. Autumn and spring times make both the preparation for laying turf and the aftercare even easier, giving the turf time to establish itself before the harshness of summer or winter months.
We’ve put together a handy blog to laying grass rolls, which includes the benefits of laying turf, a list of materials required and some helpful tips for laying turf. Our guide includes a step-by-step guide on how to lay turf rolls in your customer’s garden for the highest quality result, how to level the ground for a lawn, how to remove old grass and lay new turf, and much more.
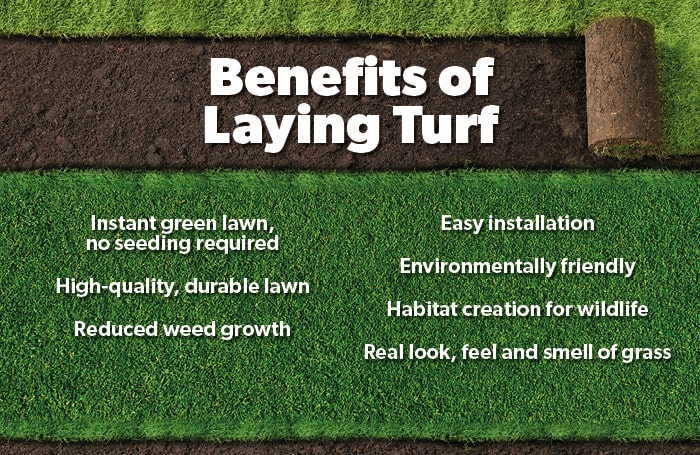
What are the Benefits of Laying Turf?
There are several reasons your customers will want to opt for turfing a lawn instead of seeding or other alternatives:
- Instant results: One minute the garden is bare, and the next you have a luscious green lawn in an instant! Seeding a lawn can take months for the grass to grow properly, so if your customer is looking for an immediate result then rolls of turf are a great option.
- High-quality and durable: Turf is often grown in specific conditions that ensure the grass is dense, durable, weed-free and healthy. A natural turf lawn is durable and robust, making it suitable for gardens and parks. When properly maintained and looked after, a natural lawn will last for many years to come.
- Less weed growth: Rolls of turf usually have less problems with invasive weeds when compared to seeded lawns. Turf is laid over soil immediately, reducing the amount of sunlight reaching any weeds in the soil below.
- Easy installation: Turf can be laid relatively all year-round, so long as the ground isn’t waterlogged or frozen. It’s also quick and easy to roll out your pre-cut rolls, lay them on the ground and wait for them to take root. Most installations can be completed within just one day, providing an instant green lawn for your customer.
- Environmentally friendly: Laying turf is a great eco-friendly option for your customer’s garden as the natural grass can reduce air pollution, cool down the garden, and absorb water efficiently.
- Wildlife habitats: A natural lawn can provide a diverse ecosystem for various species of plants, insects, and small creatures such as birds that roam throughout the garden. Alternatives like artificial grass will remove this natural habitat, reducing the amount of space for plants and animals to thrive.
Are There Any Disadvantages to Laying Turf?
Nothing beats the look, smell and feel of a natural lawn, but there are some drawbacks to consider, some of which might be a potential deal-breaker for your customers:
- Maintenance: Not only does the turf require the correct aftercare immediately after installation to ensure the turf takes root and establishes itself, but the new turf lawn will require regular maintenance throughout the years. Your customer will still need to keep up with cutting the grass, watering, fertilising, and general upkeep. For green-fingered customers who love being outdoors, this might be a good thing!
- Planning and preparation: Unlike seeding a lawn, which can be done quickly by just scattering seeds over the soil, laying turf requires planning of an entire day and preparing the soil properly for installation.
- Damage from pets: If your customer has pets like dogs or cats, natural grass can be dried out and killed from animal urine/faeces. This can cause patchy, discoloured grass throughout the garden which is unsightly.
- Allergies: If your customer suffers from allergies such as hayfever, a natural grass lawn could worsen their symptoms.
- Environmental conditions: Turf can be affected by the conditions of the environment and the weather. While natural grass is durable and resistant, it can be negatively affected by the elements in harsh weather, such as drying out in summer or freezing in winter.
Artificial Grass Vs. Turf
For some customers, artificial grass could be a better option for their needs. If they’re not very interested in the regular upkeep of a garden, if they suffer from hayfever, or if they have pets that could wreak havoc on turf, artificial grass can be considered as a happy alternative – such as our high-quality Luxigraze Artificial Grass range.
We’ve got a handy step-by-step guide on How to Lay Artificial Grass, plus plenty of other landscaping blogs to help you and your customers with outdoor projects.
For customers that have settled on a natural turf lawn, we’ll now talk you through a step-by-step guide on how to prepare for laying turf and how to turf a lawn or garden.
How to Lay Turf: Step by Step
Gather your materials
The tools and materials you’ll need to get the job done will vary project to project, but in general you might need the following:
- Turf rolls
- Topsoil
- Sharp sand
- Fertiliser
- Spade
- Rake
- Lawn edger
- Wooden pegs
- Mallet or club hammer
- Builders line
- Garden roller
- Timber scaffolding board
- Safety gear such as gloves and boots
How to Prepare Soil for Turf
The installation of your turf lawn will only ever be as good as the quality of the foundation you create for it. Smooth, level soil with no weeds, large stones or debris is crucial to your lawn installation. You’ll want to start the process of levelling, preparing and fertilising the ground at least one week before installing the turf itself.
Step 1: Use timber boards to stand on. Lay a few timber boards down for you to stand on while you lay your turf – you can use gravel boards or scaffold boards. This will help prevent your footsteps creating uneven holes and dents when you’re trying to make the ground level.
Step 2: Remove the old lawn. You can either remove older grass/turf by hand with a garden spade or lawn edger, or for larger gardens with lots of lawn you can hire a turf cutter to get the job done quicker. Old turf can be repurposed into compost.
Step 3: Dig over the dirt and remove weeds. Turn over the soil and dig over to a depth of roughly 15mm and remove any debris such as large stones, roots or weeds. If you can’t manually remove all the weeds, use a non-residual weed killer so it doesn’t stay in the soil and cause problems for the turf later down the line.
Step 4: How to level soil before laying turf. First, give the soil a once-over with a garden rake, then level and press the soil with a garden roller to create an even surface and remove any air pockets in the soil. If you don’t have a garden roller, you can tread down firmly across the soil with the heels of your feet. Add topsoil as needed to fill any gaps and keep compressing. Repeat the process of raking and flattening – you want the soil to be firm and level but not compacted.
Step 5: Use a sand mixture for levelling the lawn. If needed, you can create a levelling mixture underneath the turf if you have a particularly lumpy, bumpy lawn. This will consist of two parts topsoil, two parts sand and one part compost. The best sand for levelling lawn mixtures is fine, washed sand.
Step 6: Use a pre-turf fertiliser. Sprinkle a pre-turf fertiliser over the ground and use the garden rake once more to spread it evenly throughout the soil. Using fertiliser before laying turf will help the turf take root and establish itself quicker.
Step 7: Mark out the area. Using a builder's line and some wooden pegs/stakes, mark out the exact perimeter of the lawn.

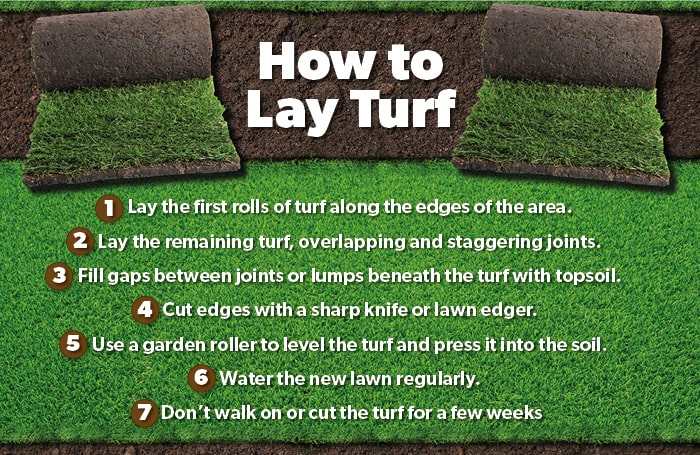
How to Lay Turf
Step 1: Lay the outside edges of the turf. Start by laying your turf rolls along the edges of the area you’ve marked out, with the length edge of the turf sitting parallel to the boundary you created with builder’s line. Check that the soil and turf is level with any hard edges around, such as paving or flower beds.
Step 2: Lay the remaining turf strips. Still using your timber boards as a platform to stand on, lay your rolls of turf from left to right. Cut any excess with a sharp garden knife suitable for cutting turf. Stagger the joints of the turf the same way you would with brickwork, and make sure there’s a slight overlap. Sprinkle topsoil between any gaps between the turf and brush in with a soft outdoor broom to avoid the edges of the turf drying out.
Step 3: Fill hollows or bumps with topsoil. If there are any hollows or irregularities underneath the turf as you lay it, you can pull back the edge of the turf and fill the below with some topsoil.
Step 4: Cut edges with a lawn edger. Cut the strips of turf to size using a lawn edger and press down the adjoining edges so the turf settles into the ground below. Step 5: Roll over the finished lawn. Using your garden roller, roll over the finished lawn to level out the turf and help embed it into the soil below.
Step 6: Water the new lawn. Watering newly laid turf regularly is very important in the beginning to encourage the turf to take root and establish properly and quickly. In spring or summer, your customer might need to water the turf twice a day until it’s established.
Step 7: Cutting the new lawn. Your customer might be wondering when to cut new turf. They should avoid touching or walking on their new lawn for at least the first couple of weeks after installation to allow the turf to take root and knit together. To find out if the turf has taken root, your customer can gently try to lift an edge of the turf – if it doesn’t come up, it’s taken root. When your customer cuts their new turf for the first time, make sure they only cut a third of the grass height at a time.
Get the supplies you need to lay turf

FAQs
-
How much turf do I need?
To figure out how many rolls of turf you’ll need, first measure out the length and width of the space you intend to lay turf over. Multiply the length and width together to find out the area (m²) you’ll be covering. The turf you’re purchasing should say how many m² per roll it will cover, allowing you to work out how many you’ll need to cover your total area.
-
How long does it take to lay turf?
This depends on the job at hand and the amount of area you need to cover, but laying turf can usually be done in a day. Turf ideally needs to be laid the same day that it’s delivered. Remember you’ll need to prepare the soil a week or so in advance.
-
Should you compact topsoil before laying turf?
To prepare topsoil for laying turf you’ll need to lightly press, flatten and even out the soil, but you don’t want it to be too compacted. Break up compacted soil, then use a garden roller or tread along the ground with your heels to level it out, raking the surface as you go to get it level and even.
-
Can you lay turf on top of grass?
It’s not a good idea to lay turf on top of grass because this will prevent the turf from taking root and properly establishing itself, causing problems for the new lawn down the line. It’s best to remove any old lawn before laying turf.

By Rae Davis
Rae is a Digital Copywriter within the Selco Team with 10 years' experience in the construction industry and specialises in long-form content writing. With a love for research and simplifying complicated information into easy-to-follow content, she is known for her handy how-to blogs. When she’s not at her desk, she’s got her head either in a book or up in the clouds.
< Back to Gardening and Landscaping