
There are plenty of reasons you or your customer might want to build a summerhouse or outbuilding. Having a private space away from the main house has several benefits and advantages, whether you’re looking to create a cosy office to work from home, an entertainment room or bar, a recording studio, a sauna, a luxurious kennel for a four-legged friend, or even just a place to sit and read. There are plenty of possibilities with what you can do with your outdoor haven, but the general process of building a summerhouse from scratch should have all the most familiar points covered no matter what it’s intended to be used for.
This blog will cover the materials and tools you’ll need, summerhouse planning permission, how to make a summerhouse step-by-step, including top tips and advice.
Make sure to check out our other handy landscaping blogs, such as how to lay decking, for more advice and step-by-step guides to help transform your customer's outdoor space.
Before you get started
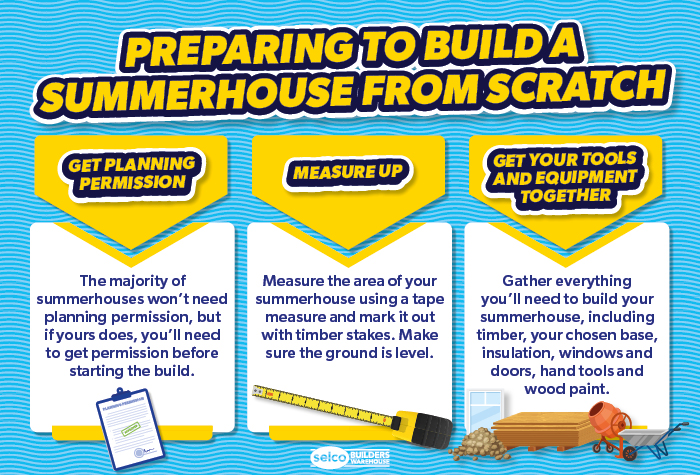
1. Summerhouse planning permission
Before you even start to gather your tools and equipment, you’ll need to make sure you have the right permissions to be building a summerhouse or outbuilding in your garden space. This will help you avoid any issues with the local authority. If you’re up to date on the building regulations for outbuildings in your area, you might already have a good sense of whether your customer’s plans will require permission straight away. In many cases, you won’t need approval as most summerhouses are considered permitted development, depending on the size and proximity to the property and its boundaries. Customers might be more likely to adapt their visions rather than wait for planning permissions to be approved.
There are various sources on the internet that will provide you with key information, such as Planning Portal outbuildings planning permission page, or the government website.
2. Measure up & level up
Once your summerhouse planning permission has been taken care of and you’ve collected your supplies, it’s onto measuring the area. You’ll need to measure accurately to decide how everything will fit together and to work out the number of materials and tools you’ll need to get the job done. Mark up the area of the summerhouse using a tape measure and timber stakes, chicken wire or marker paint.
At this point, you might need to level the ground you’re working on. Here you’ll also need to check for proper drainage and start considering how you’ll incorporate guttering and electricals into your structure if needed.
3. Gather your tools and equipment
Building a summerhouse from scratch can seem like a hefty, time-consuming job. But with the correct tools and materials you’ll be able to get the job done with efficiency and ease. Every project will have slightly different requirements depending on your customer’s budget, preferences, and what the summerhouse will be used for, but in general you’ll need:
- Ground levelling tools
- Timber and structural materials
- Your chosen base (slabs, wood, breeze blocks)
- Windows and doors
- Insulation
- Wood treatment/preservatives
- Combi drill
- Screwdriver
- Screws
- Handsaws / electric saws
- Tape measure
- Spirit level
The cost of a summerhouse will vary greatly depending on the type of materials you decide to use, such as the type of insulation, flooring, paint and stain, as well as the overall size of the construction. The purpose of the summerhouse will also impact the project's complexity: an outdoor gym or gaming room might cost a little more than a simple work-from-home space with a desk.
4. Adding electricity
If your outbuilding is going to need electricity, you’ll want to get everything wired up before you start on other elements of the construction. According to Part P of UK building regulations, if you’re not a Part P qualified electrician yourself, you’ll need to hire one to run a cable out from the main house protected by an RCD. Wires must be buried at a depth where they cannot be “damaged by any disturbance of the ground reasonably likely to occur.”
If the summerhouse will need Wi-Fi, here’s where you’ll need to consider how to go about extending Wi-Fi to outbuildings, whether that be running an ethernet cable from your main router or using Wi-Fi extenders and boosters.
How to build a summerhouse, step by step
For a quick look at summerhouse installation, try the following video:
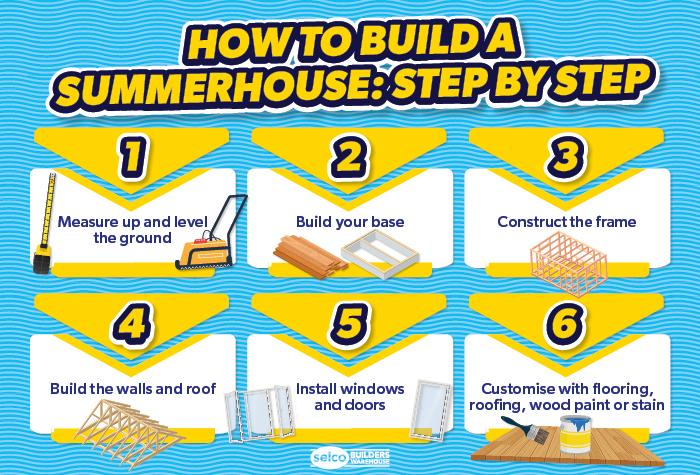
The steps below will help you build a summerhouse from scratch, from creating the base to building the structure, insulating and attaching the roof, windows and doors. The individual steps might vary depending on your customer’s needs and preferences, but our guide will help you with basic support and guidance.
Step 1: How to build a summerhouse base
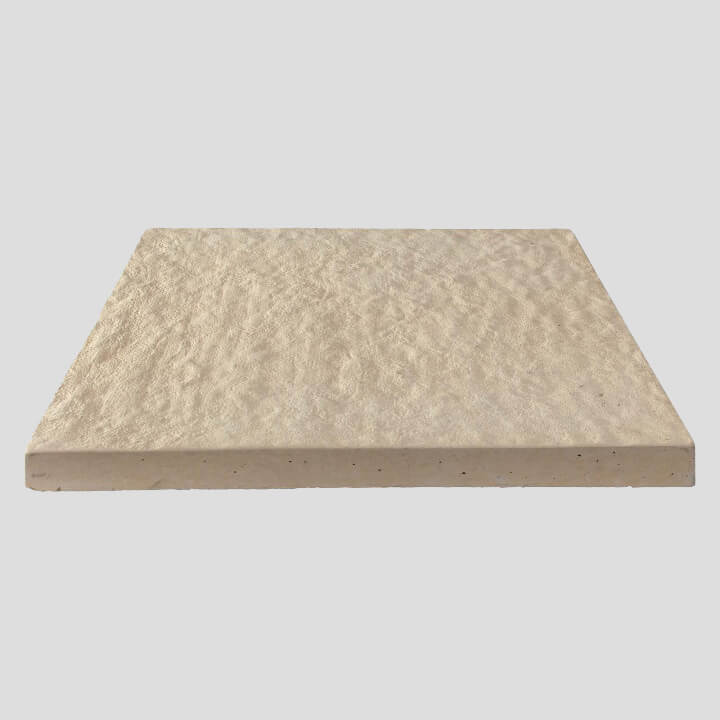
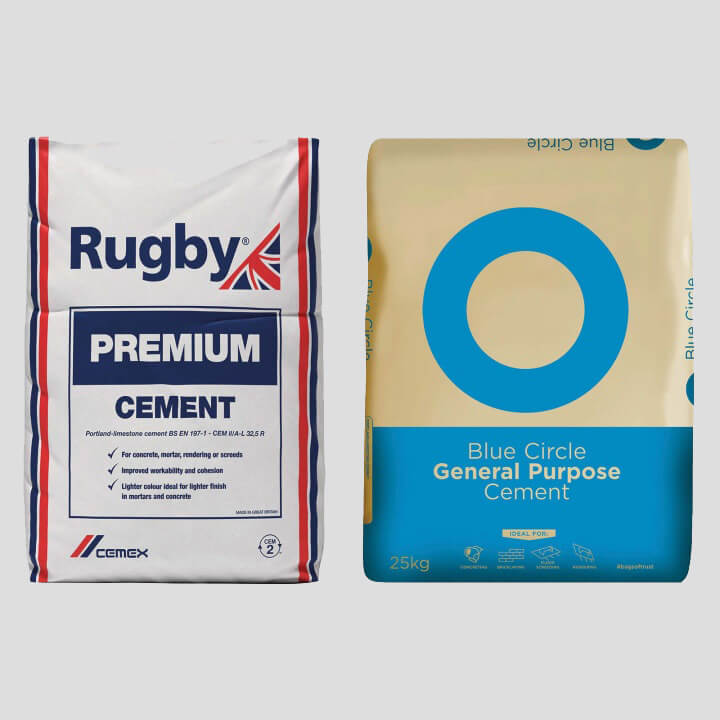
A solid, level and sturdy foundation for a summerhouse is an essential part of the building process. You’ll dig out a trench in the space you’ve marked out before building your chosen foundation. Depending on your project requirements and what the summerhouse is intended to be used for, you could create a base from concrete, paving slabs, or timber decking.
- Concrete: A concrete base for your summerhouse would be a highly durable and long-lasting option, where you can lay a layer of concrete over a layer of aggregate.
- Paving slabs: An easy-to-install and cost-effective solution, paving slabs can be laid over a bed of aggregate like gravel or sand and cement.
- Timber frame: Building a secure, level timber frame for a summerhouse is a fantastic option for a more robust structure.
If you’re using a timber frame, lay your wooden planks and consistently check with a tape measure and spirit level, making sure the corners are at even right angles. You can add 45° corner braces to keep everything secure. Make sure to always use pressure treated wood for your summerhouse to ensure its protected against rot, fungi and insects.
Step 2: How to build the walls of a summerhouse
Now that you’ve laid your summerhouse base, you can start to build the walls. Start with the back wall as all the beams will be the same length.
Create a skeleton frame of the walls and roof – make sure the ceiling beams are heavy-duty and durable so they will support the roof. When building your summerhouse frame, make sure to measure where the door and windows will go and leave gaps for them. Use a spirit level along the way to make sure everything is in line and square, so the sturdiness and stability of the summerhouse won’t be compromised.
Next, you can construct the walls using timber studs, or you could use drywall on the inside and timber cladding on the outside for a rustic appearance.
Step 3: How to insulate a summerhouse
When constructing your summerhouse, you might want to think about installing some insulation to help keep your summerhouse cool in the summer and warm in the winter.
First, choose the type of insulation you think works best for your project, such as glass mineral wool insulation rolls or PIR insulation boards. You’ll want to install the insulation in the structural frame stage, in the walls, floor or roof. You can cover the insulation with drywall or plywood to create a clean finish.
Step 4: How to build a summerhouse roof
Slot the roof support beam into position, checking all along that everything is even and secure, then fix it in place with L-shaped brackets and screws. If your summerhouse needs multiple additional support beams and rafters, you’ll add them at this stage too.
You can choose to protect your roof using roofing felt at this time too. Next, mark and drill fixing holes on each roof panel then lift the panels up, one by one, and screw them to the roof support beam. With the screws in place, nail them to the sides of the summerhouse using a nail gun if necessary.
Step 5: Fit the door and windows
Fit your chosen doors and windows with frames in the gaps that you’ve left for them using high-quality hinges. At Selco, we offer plenty of doors for outbuildings including high-quality external wooden doors to match your summerhouse.
Step 6: Add the finishing touches
By now you’re probably already standing back to admire your self-built summerhouse, but it’s at this point that you can customise your outbuilding and bring its purpose to life. Now that you’ve built your summerhouse it’s time to add personalisation – this might include roofing, flooring, suitable exterior wood paint or stain, or cladding/shiplap. Consider felting and tiling your roof or attaching OSB board to the internal side of the roof which can also double as extra insulation.
Get the products you need for the job


Building a Summerhouse FAQs
-
Do you need planning permission for an outbuilding?
Most summerhouses that are positioned carefully within a back garden won’t need planning permission. It will depend on your customer's plans, such as the size of the summerhouse and how close it is to the property’s boundaries. Make sure to do thorough research into whether you’ll need planning permission before starting your project.
-
What is the best foundation for a summerhouse?
Your summerhouse base could be made from a solid timber frame, paving slabs, breeze blocks or concrete. Consider how durable and long-lasting you need your base to be, as well as your budget and any special requirements for the job such as the condition of the soil, before deciding on your summerhouse base.
-
What maintenance does a summerhouse need?
Depending on the wood you’ve used for your summerhouse, you’ll need to protect it with treatments and preservatives such as fence paints and stains to protect the wood and prevent it from rot, decay, damp, insects and fungi. As well as your initial coating you’ll need to top it up with a fresh coat every 1-5 years.

By Rae Davis
Rae is a Digital Copywriter within the Selco Team with 10 years' experience in the construction industry and specialises in long-form content writing. With a love for research and simplifying complicated information into easy-to-follow content, she is known for her handy how-to blogs. When she’s not at her desk, she’s got her head either in a book or up in the clouds.
< Back to Gardening and Landscaping