
There are several types of garden walls and countless reasons a customer might be asking for one: they might want a purely functional wall to act as a dividing line or barrier between their property and another, or they might want something more decorative which requires you to exercise a bit of creativity in the design process. Remember to view our Selco landscaping brochure for inspiration in your gardening projects! Plus, we've got plenty of other landscaping blogs to browse through, such as how to build a summerhouse and how to lay artificial grass.
If you’ve already been working on the rest of your customer’s landscaping and have stocked up on garden supplies, this is where you get to pick a garden wall construction that will perfectly frame and complement your finished work. But there’s many questions to consider first: what is a garden wall, and what is a retaining wall? What are the best bricks for a garden wall? What should a garden wall’s foundation depth be? We’ll try to answer as many questions as we can in the guides below.
What’s the difference between a garden wall and a retaining wall?
Retaining walls are built specifically for supporting outdoor structures or as the name suggests, retaining soil and slopes. They’re built to hold a considerable amount of soil or aggregates and stop it from eroding down a slope and are backfilled with heavy, packed sand or gravel. They’re thicker and sturdier than garden walls but can still be decorative and add aesthetic value.
Garden walls are used to define the boundaries between different areas of the garden or provide a perimeter. They’re a more decorative feature, and are relatively low, usually below 1m, or 3ft. Because of their lightweight, short structure, they can’t retain heavy amounts of soil, and are therefore used primarily for decorative purposes. If you’re looking to define garden beds and paving areas or even install some low seating, garden walls are a great option.
In short, garden walls define a boundary, and retaining walls hold back soil.
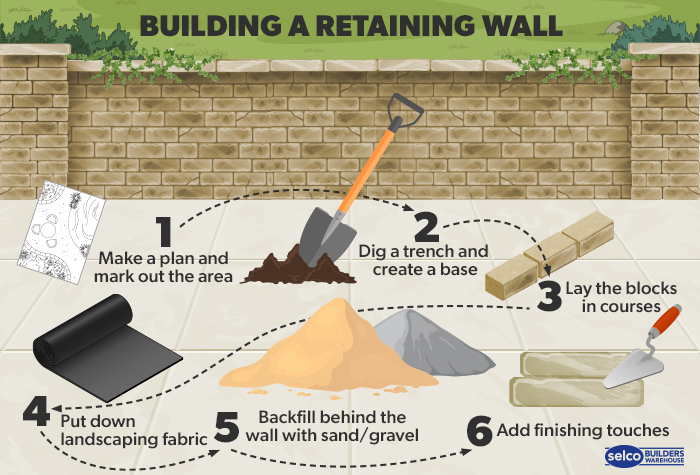
How to build a retaining wall
- Planning and preparation
- Consider the space and the retaining wall design. Make sure you have a good base to start with and sketch out a drawing of your plans.
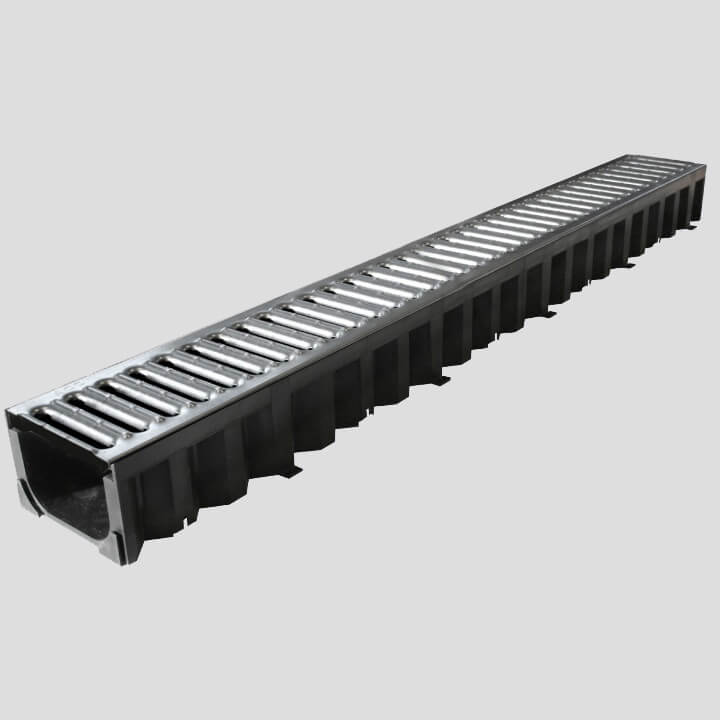
- Check your local building regulations for landscaping planning and permission and consider important elements such as drainage – taller retaining walls will need drainage features to reduce pressure on the wall.
- Make sure you have the right equipment, such as soil, aggregates, blocks, shovels, stakes, pegs, spirit level, string, hand tamper etc.
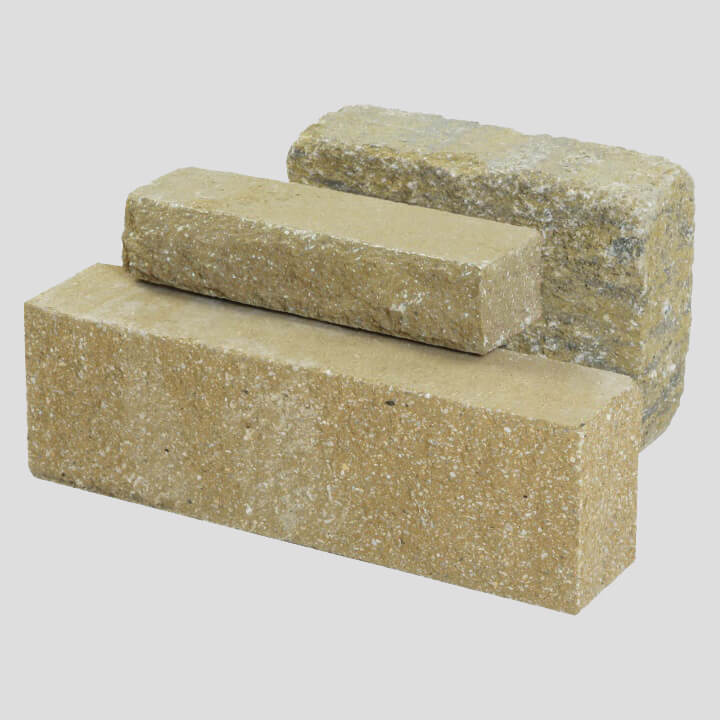
- Calculate how many blocks you’ll need – the best way to work out the amount needed per row is to divide the length of the wall by the length of a single block. Concrete blocks, also known as breeze blocks, are a great option and can be rendered and painted to any colour. You can also use cinderblocks, bricks, boulders and more.
- Mark out the area using string, stakes, a shovel and a spirit level.
- Dig your trench
- Spread and rake your paver base
A retaining wall's base is very important and must be set below ground level. Go with your gut, but the best depth for a trench usually falls between roughly 100-150mm (4-6 inches) or so. You’ll have your spirit level to hand to keep things even, as well as a hand tamper for flattening the dirt.
Retaining walls will be most stable when built on a porous
- base, and the layer of sub-base (like sand or gravel) will be around 50-75mm (2-3 inches) deep. Keep your level and hand tamper close by, as you’ll need them again here to smooth and flatten.
- Lay your first row of blocks
- Install the rest of the blocks
- Put down landscaping fabric and backfill the wall
- Finish up and admire your work!
The first row (course) of blocks is the most important, as any faults or differences will affect all the blocks placed on top. Start at the least elevated end of the wall and lay the first course of blocks, continuously checking them with your spirit level.
Continue laying the other rows of blocks, using a “running bond” pattern where each block is offset by half of the block below it to enhance the stability of the wall. Keep checking each course with your spirit level as you lay it. Make sure you’re implementing good drainage solutions here if needed and cut and set any half blocks at the end of the rows.
Put down some gardening membrane before filling in the space behind the wall with a porous material like sand or gravel to help with drainage. Rake or shift the sand/gravel with your shovel to spread it evenly – the more compact the backfill is, the more stable your retaining wall will be.
Lay your final rows of blocks, spreading concrete adhesive on the wall beforehand. Finally, fold any excess landscaping fabric out of the way and finish with soil and plants.
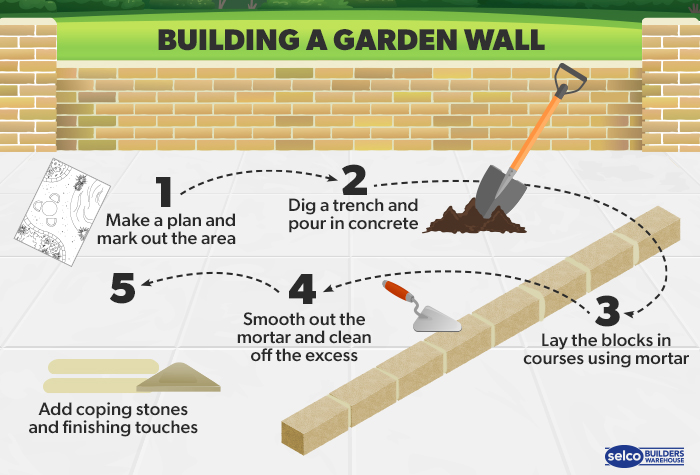
How to build a garden wall
As there’s a lot of overlap between how to build a retaining wall and how to build a block garden wall, we’ll go into a little less detail in these steps.
- Planning and preparation
- Lay your foundations
Consider the space, sketch up a detailed plan to scale, and calculate how many blocks or bricks you’ll need. Then, after checking you have all the right equipment, you can mark out the area with string and stakes. You’ll want to have to hand some trowels and a pointing bar, spirit level, timber, rubber mallet, shovel, concrete and mortar.
Dig your trench (at least 50mm below ground level) and place some timber pegs at regular intervals along its centre. For your garden wall footing, pour your concrete into the trench and tamp it down – you can browse our cement mix range for this and make sure you check it with a spirit level. The 24 hours or so it takes to set always leaves a nice opportunity to get any other landscaping work for your customer out of the way.
- Lay your blocks
- Add your finishing touches
Start off with a layer of mortar on the concrete footing, slightly rippling it with the trowel to make it grip to the blocks better. Lay the first course of blocks, making sure to keep the mortar off the face of the blocks to keep your garden walls neat and stain-free. Move onto the rest of the courses, cutting any blocks you need to as you go and offsetting each layer by half a block, so the vertical joints aren’t aligned. You’ll be checking evenness with your spirit level regularly.
Smooth out the mortar with your trowel and clean away any excess from the joints. Top the wall off with some attractive coping stones on a bed of mortar.
So, whether you’re building a retaining wall for a patio or garden, or a garden wall to add a decorative border, we’re sure you’re ready to get started and create the perfect walls for your customer’s garden.
Get the supplies you need

FAQs
-
What are the main supplies for building a wall in the garden?
The main supplies you will need to build a garden wall fall into 3 categories:
- Walling
- Drainage
- Cement
-
How to render a garden wall?
Make sure you’ve got a smooth surface by filling in any cracks on your garden wall and thoroughly cleaning it down, then mix up your chosen render. Apply the first thin layer of render to the wall immediately, add some rendering mesh, then apply a second layer after the first has dried. Finish the look by running a long, smooth plank of timber down the wall to smooth the surface and wipe it all down with a damp sponge.

By Rae Davis
Rae is a Digital Copywriter within the Selco Team with 10 years' experience in the construction industry and specialises in long-form content writing. With a love for research and simplifying complicated information into easy-to-follow content, she is known for her handy how-to blogs. When she’s not at her desk, she’s got her head either in a book or up in the clouds.
< Back to Gardening and Landscaping