
Do you need to install an extractor fan in a bathroom?
The simple answer is yes – if you have a bathroom, you’ll need the appropriate bathroom ventilation installation to go with it. Simply opening a window whenever you take a bath or shower might not be enough to properly ventilate the room. If you want to keep the bathroom space looking, smelling and feeling fresh, extractor fans are a crucial component in removing moisture from the room and keeping the air clean.
Removing moisture from the bathroom is essential to prevent the build-up of damp and condensation, which can lead to the growth of mould and mildew. Areas such as the shower, toilet, basin, other bathroom furniture and your bathroom tiles are prone to the growth of mould, and since it thrives in moist environments, keeping your bathroom well-ventilated is a necessity. Extractor fans are also great for removing odours and stale air, keeping the bathroom smelling fresh and clean.
So, how does an extractor fan work? A bathroom extractor fan works by pulling the air, as well as any odours, in the room towards the fan, forcing the air through a duct system before expelling it outside of the building. Extractor fans should be turned on after you’ve taken a bath or shower to remove steam, moisture and smells. When it’s not in use, you can leave the bathroom door or window open to help with ventilation.
The rules on bathroom ventilation are outlined in Building Regulations Part F, but in summary, bathrooms in the UK need to be ventilated by either a window or an extractor fan and many newly built homes require an extractor fan as a must.
Remember to browse our other bathroom blogs for advice, inspiration and step-by-step guides, such as how to fit a toilet or first fix and second fix electrics in the bathroom.
Before you get started on your bathroom extractor fan installation
Here are some key questions and factors to consider before you begin fitting a bathroom extractor fan. Each project will have different needs, so make sure to consider your customer’s budget, requirements, the size and shape of the bathroom, as well as any personal preferences and styles. Whether you’re looking to replace a bathroom extractor fan or install a brand-new one, here are some questions you might need to ask first:
What type of extractor fan do I need?
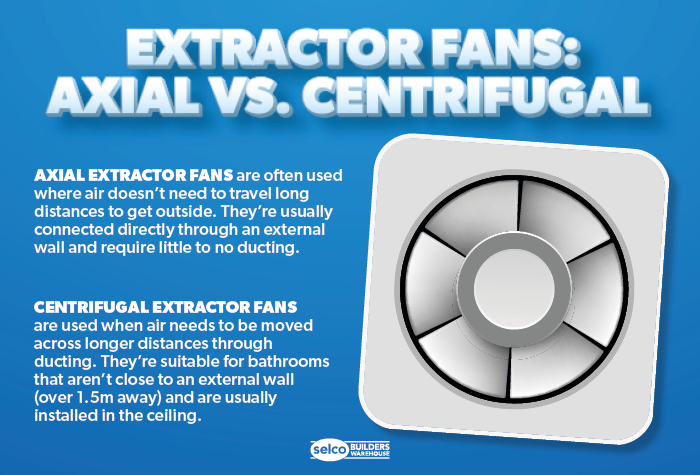
Factors such as your bathroom extractor fan location, size and type need to be considered before you begin installation. You can choose between either a ceiling extractor fan or a wall extractor fan, each of them with their own advantages and benefits. There are two main types: axial and centrifugal.
- Axial extractor fans: These are used when the air does not need to travel long distances, and therefore they require either no ducting or very short ducting. They have a low-pressure output and are often connected directly to an external wall.
- Centrifugal extractor fans: Centrifugal fans have a high-pressure output. They’re often installed in the ceiling and are designed for bathrooms that aren’t close to an external wall (over 1.5m away), so they require longer ducting.
There are also inline extractor fans, which are installed directly within the duct rather than at the end of it, often in the ceiling. Inline extractor fan installation is often recommended for extra-long ducting distances of 40m or more.
Bathroom extractor fans are sometimes referred to as bathroom exhaust fans, and although the terms ‘exhaust fan’ and ‘extractor fan’ are often used interchangeably, exhaust fans in the UK tend to be bigger in size. If you’re working in a large commercial building, you might want to look into bathroom exhaust fan venting options.
What size extractor fan do I need?
It goes without saying that the larger the bathroom you’re working in is, the larger and more powerful your extractor fan needs to be. A standard-sized bathroom will require a fan that extracts a minimum of 15ltrs per second. Make sure to keep in mind that a larger fan will most likely be noisier than a smaller fan.
Switch, remote-controlled, or pull-cord?
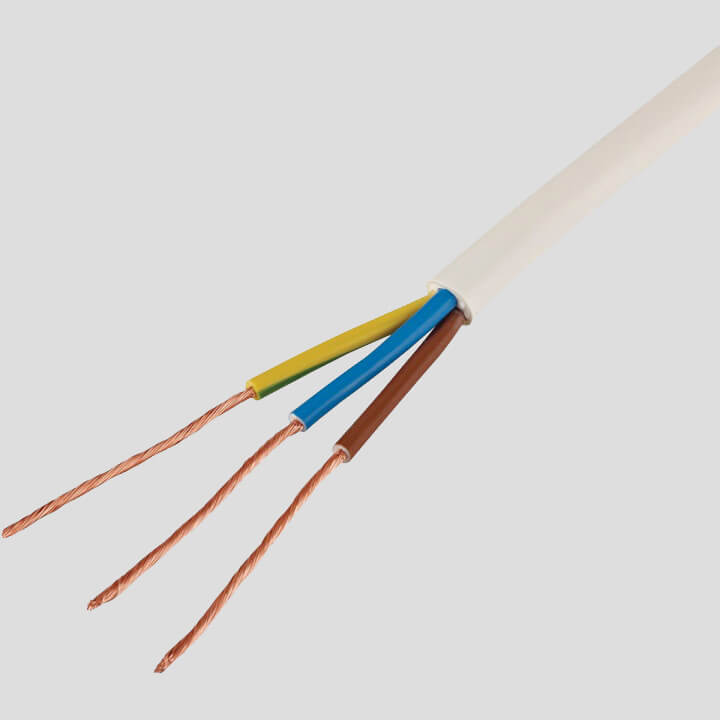
Extractor fans don’t run constantly – your customer will turn the fan on and off when the bathroom needs ventilation, such as after someone has taken a bath or shower. The extractor fan can be connected to the existing lighting circuit, or if your customer would prefer to switch it on and off independently, the fan will of course need its own separate circuit. As for how to switch it on and off – you could use an old-fashioned manual pull-cord, a handy remote control, or a switch.
How to connect an extractor fan to a light switch: Many extractor fans are connected to a lighting circuit in a bathroom, as a lot of them have a “run on” capability that can be triggered by turning the light switch on and off. This can also work with showers, where the extractor fan is turned on at the same time as the shower is. Make sure to install your bathroom extractor fan in a place where you can easily run cables to meet it.
Basic, timer or Humidistat?
A basic extractor fan will only switch on for the duration that the light switch is on, but a timer extractor fan might be more efficient as they come on when a light is switched on and stay on for a set amount of time after the light has been switched off. Humidistat extractor fan models work independently from lighting circuits and automatically sense humidity levels, turning on when needed – such as when someone is having a shower.
Gather your tools and materials
Every job will be different, but in general you’ll need the following tools and equipment for your bathroom ventilation fan installation:
- Extractor fan unit
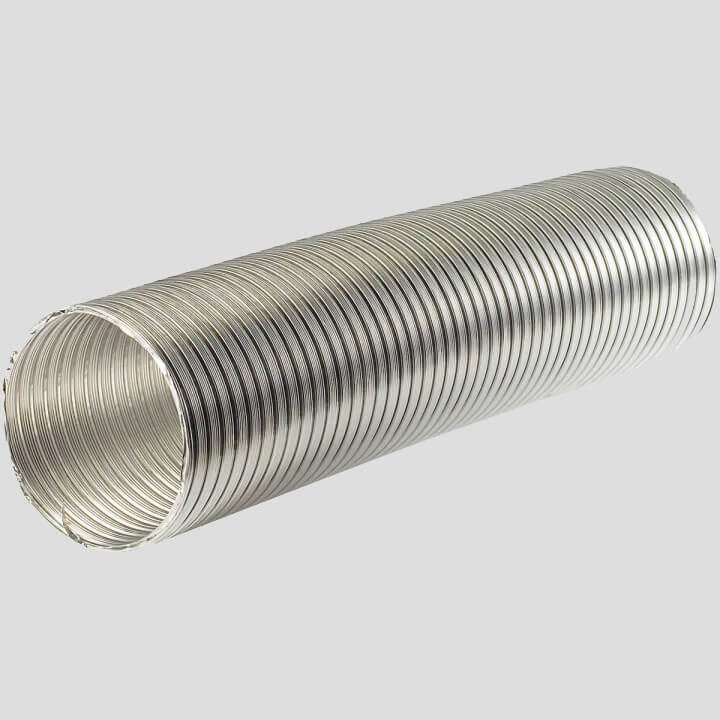
- Flexible ducting (if needed)
- Grill / vent cover & fittings
- Drill & the correct drill bit (such as a masonry bit for drilling into brick/concrete)
- Saw (depending on if your fan is in the wall or ceiling, you might need a pad saw, jigsaw or circular saw)
- Screwdriver
- Stepladder
- Tape measure & pencil
- Spirit level
- Safety equipment (such as safety goggles, gloves & dust mask)
- Electrical tester / multimeter
- Electrical cable & connectors
- Hammer & chisel
- Wire strippers
How to install an extractor fan through a wall, step by step:
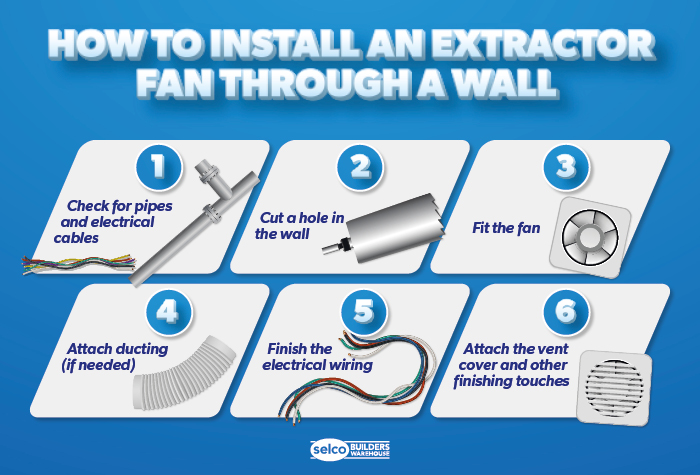
Step 1: Check for pipes and electrical cables
Turn off the power in the area you’re working in as you’ll be working with electrical cables. After considering the type of fan you’re using and where you want it in the room (making sure it’s easily accessible for ducting and electrical wiring), you’ll need to use a pipe and electronic detector to check for any hidden wires and pipes. Make sure there are no external pipes on the outside wall, too, and never install the outlet directly below a window.
Step 2: Create a hole in the wall
Using your tape measure and pencil, mark out where you want the extractor fan to go on the wall and mark the exact centre point. Drill a small reference hole at the centre point, through the inside of the wall to the outside. Check the hole from both sides and make sure you’re happy with the placement.
Next, drill holes around the outline of where your fan will go, at around 35mm intervals. You can then either use a hammer and chisel or a jigsaw/reciprocating saw to cut out the rest of the hole required for your extractor fan unit.
Step 3: Position the fan
Place the fan in the hole you’ve created – it should fit snugly so long as you’ve measured everything correctly. Use the appropriate screws and wall anchors to secure the fan into place using your screwdriver. Use your spirit level along the way to make sure your fan is level. Make sure all the connection points are properly positioned, too.
Step 4: Attach ducting (if needed)
If your extractor fan model requires ducting, here you can insert the flexible ducting into the hole, connecting it to the fan housing and running it out of the external wall so the air will be vented outside. It should fit at a slightly downward angle and sit flush against the walls. Secure the ducting with duct tape or clamps (you can trim it with your saw if needed).
Step 5: Finish the electrical wiring
If you’re not a qualified electrician yourself, you’ll need to hire one to complete the extractor fan wiring. The cables for the fan have probably already been laid in the first fix stage of your bathroom and wired into the light switch, if necessary. Following the correct approved codes of practice for electrics, connect the electrical cable from the power source to the extractor fan (you might need to strip the ends of the wires with wire strippers before connecting them).
It’s a good idea to run a quick test here by turning the electricity back on and making sure the fan works as it should.
Step 6: Install the grill and other finishing touches
Secure vent/grill covers over the fan on both the internal and external walls, using the appropriate screws and caulk to seal the edges – add caulk to any gaps around the fan housing too to ensure an airtight fit. Run a final test to make sure your new extractor fan is working correctly.
How to install an extractor fan in a bathroom ceiling, step by step:
The steps to installing an extractor fan in a ceiling are pretty similar to installing one through a wall, but there might be some extra steps involved:
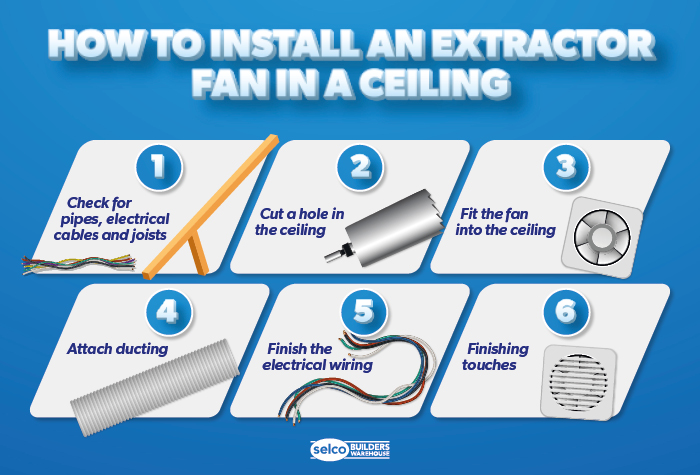
Step 1: Check the area and create a hole in the ceiling
Make sure there’s room in the loft area for the fan. Use an electronic detector to check for any hidden pipes or wires. Switch off the power in the area you’re working on now to be safe.
When cutting a hole in the ceiling for your extractor fan, make sure you’re cutting between the horizontal support beams and joists in the ceiling. Use your tape measure and pencil to mark where you want the fan to go and mark the centre point. Drill through the ceiling at this centre point, then use a pad saw to cut out the hole for the fan.
Step 2: Fit the vent into the ceiling
Attach any duct pipe fittings onto your vent, then push the vent into the hole and secure it to the ceiling using your screwdriver (your ceiling type will determine the type of fixing needed, such as screws or wall plugs). You might need to go up into the loft or lift floorboards upstairs for this step.
Step 3: Install the fan in the loft
When installing the fan in the loft, it’ll need to be secured to the floor on the loft side of the ceiling. Mark the holes needed for the fan’s frame with pencils and drill holes before securing the frame with a screwdriver.
Step 4: Attach ducting
Insert your flexible ducting, attaching it to the ceiling vent on one side of the extractor fan, and on the other side of the fan attach it to the outside source of ventilation. The ducting should run from the fan to the outside via the shortest route possible.Step 5: Finish the electrical wiring
Remember that if you’re not a qualified electrician yourself, you’ll need to hire one to complete the electrical wiring for your ceiling extractor fan. Again, you’ll follow the correct approved codes of practice for electrics, connecting the electrical cable from the power source to the extractor fan (you might need to strip the ends of the wires with wire strippers before connecting them).
Step 6: Test the extractor fan
Run a test to make sure the ceiling extractor fan is working properly and you’re happy with everything. Finally, you can replace any insulation or floorboards you might have disturbed in the installation process.
Get the supplies you need to finish the job
FAQs
-
How does an extractor fan work?
An extractor fan works by pulling air and steam out of a room and expelling it outside. Read more about how extractor fans work.
-
How to remove an extractor fan from a wall?
Turn off the electricity, then remove the extractor fan’s outer vent cover and disconnect the fan’s wiring as well as the ducting, before removing the fan housing entirely. Next you can install your new fan by connecting it to the electrical cables and ducting you disconnected before.
-
Do extractor fans need to vent outside?
Yes, an extractor fan must vent outside. The air that is pulled through the extractor fan must be expelled outside, so the fan needs to be connected straight through an external wall or duct through the ceiling to an exterior vent.

By Rae Davis
Rae is a Digital Copywriter within the Selco Team with 10 years' experience in the construction industry and specialises in long-form content writing. With a love for research and simplifying complicated information into easy-to-follow content, she is known for her handy how-to blogs. When she’s not at her desk, she’s got her head either in a book or up in the clouds.
< Back to Bathroom Ideas & Advice