
First and Second Fix bathroom plumbing
The first question to ask from a bathroom plumbing perspective is whether the existing set-up is fit for purpose, or whether it needs adjusting. If you are moving the location of any taps, then there will almost certainly be some pipework that needs doing.
Your client’s home will either be fitted with a direct system or an indirect system.
Direct system
A direct system sends cold water to every point in the home that it is needs – at mains pressure.
Indirect / Gravity fed system
An indirect system only sends cold water to the kitchen tap. Other cold water is stored in a water tank, typically situated in the loft space.
Why is it important to know the difference? Because you have to establish what the hot water system is, before your client can start picking the taps and shower that they like. Some taps and shower valves rely on high-pressure systems to work properly.
High-pressure water system
More common in newer and smaller homes, these systems provide hot water on demand, using a combi boiler.
When the hot tap is turned on, the boiler senses the flow of water and activates the heat exchange unit, heating the water as it passes through. The flow must be at a certain pressure in order for the water to be heated.
It’s important you query what kind of water pressure your client currently gets from his/her system. If they’ve got their heart set on a power shower with a flow rate of 30 litres per minute at 3-bar pressure, but their system only delivers 15 litres at 1 bar, they’re going to end up disappointed!
-
1. How much hot water do they need?
Extra bathrooms are not so much a luxury as a given in modern houses. You often find an upstairs family bathroom, a downstairs cloakroom or toilet, plus one or even multiple en-suite bathrooms.
Your client may well want to fit extra bathrooms or en-suites into their home, especially if they have a large family, or people staying over regularly. The question is, have they got enough water to supply each bathroom? No-one wants the hot water to run cold after just a couple of showers.
Do the water flow maths
This is just a guide to give you an idea of how much water your client will need to store.
The average shower produces around 9 litres of water every minute.
For a 5-minute shower, therefore, you need 45 litres of water.
If the client fancies installing a power shower, or they have family members who like to enjoy a longer shower, then they may be in trouble.
A typical water tank – the kind that sits in the airing cupboard – will hold between 110ltrs and 250ltrs. If it’s an extra bathroom that you are installing, the tank will need to be at the top end. If it isn’t you may have to manage your client’s expectations as to what is realistic.
-
2. Bathroom water temperature
There are strict guidelines that cover hot water temperature in the home. Water must be stored above 60°C to prevent bacteria from forming. Yet you certainly don’t want it coming out of your shower at that temperature. For this reason, most modern showers are fitted with thermo-static mixer valves, to keep the temperature down.
Of course, if your client likes to linger in the bath for a long time, topping it up with hot water periodically, you might not want to fit a TMV on the bath taps.
-
3. First fix plumbing
While you’re concentrating on getting the walls put up, your plumbers and electricians will get the first stage wiring and plumbing in place.
From a plumbing perspective, this might mean getting a new boiler installed, but it could just mean connecting the hot and cold water supply to the taps and to the shower. Waste plumbing will need to be completed at this stage too.
Depending on how many people you’ve got working on the job, the first fix stage can be quite tricky to manage. The best thing to do is try and stagger the days on which everyone comes in, so you can avoid getting in each other’s way.
-
4. First fix pipework
If you’re doing the pipework yourself, you’ll most likely be working with 15/22mm plastic or copper pipes.
If time is at a premium, you may want to consider using push fit pipes. You may have come across them in the past, particularly if you work on new build houses. As you might expect from the name, they fit together quickly and easily – certainly a lot quicker than soldering copper pipes together!
Whatever pipework you will be working with, always bear in mind that the supply pipes to both the shower and the bath taps should be laid under the floor boards, so that they are easy to access if needs be, in the future.
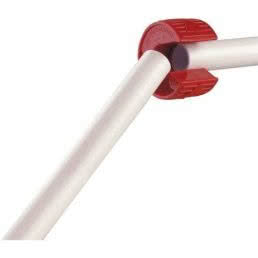
Push fit pipes
-
5. First fix pipework installation pointers
Now that you’ve cleared the old suite, you’re ready to start prepping for the new suite. Here are a few things you need to consider for each piece of bathroom furniture.
Remember that you’ve got to get the shower and bath installed at first fix, and that you’ve got to make sure it’s properly waterproofed before anything is tiled.
Bath
You need to install a shallow waste bath trap (1.5 inches) as well as a 1.25-inch basin waste. If the existing washes are in decent condition then there’s no need to replace, though it is always advisable to swap old washers for new ones.
Basin
Is the current basin waste pipe directly in line with the waste outlet in the basin? If so, you’ll need a pedestal or bottle waste, the outlet of which is immediately below the inlet.
Cistern
The only thing to bear in mind with the cistern at this stage is whether it has a side entry water inlet. If so, you will not be able to use a flexible tap connector. You’ll have to use a copper one.
Shower
It is sensible to fit a flow limiter valve before you install the shower. If there’s an imbalance between the cold and hot water pressure at the point it arrives at the shower mixer, your client can end up with either poor water temperature or a backing up of water through the valve.
Useful supplies
-
6. First fix wastewater
Perhaps the most important job you have during the first fix of pipework is ensuring good waste disposal. Different bathroom suites will require different tasks at this point. You might have to connect waste pipes from the toilet, shower, bath and basin, to allow waste and soil water to drain efficiently away and into the soil vent pipe.
Remember, you must use the correct diameter pipe for each job, or you may find yourself coming back to unblock something at a later date.
In accordance with building regulations for waste pipe falls, you need to fit the toilet as close as possible to the soil-vent pipe. One of your first steps should be to locate the 100m diameter soil-vent pipe, as this will have a big impact on where you can locate not just the toilet, but the rest of the bathroom furniture around it.
These days, above ground drainage systems are pretty straightforward to install, not least because you now have push-fit fittings to work with. Of course, it’s worth remembering that solvent-weld pipework is the most durable. IF you are going to conceal the pipework, or it will be inaccessible once the job is complete, solvent-weld is the way to go.
Useful supplies
Stainless steel bath waste and overflow 1 1/2”
Stainless steel sink waste and overflow 1 1/4”
Stainless steel sink waste and overflow 1 1/2”
Stainless steel vanity waste and overflow 1 1/4”
-
7. Plumbing behind the wall
If your client is going for a ‘hotel-style’ bathroom, they may well ask you about wall-hung or back-to-wall plumbing. This is where the toilet and sometimes the sink look like they’re floating on the wall, rather than being attached to the floor.
As you might expect, anything hung like this will require a cistern that’s attached to a frame and plumbed in behind the wall.
The frames are usually adjustable, or at least have adjustable feet, so that you can raise and lower the height. You mount them on the frames on the drywall, then tweak the height to the right spec, using the adjustable feet.

Useful supplies
-
8. Second fix plumbing
At this stage of the bathroom renovation, you’ll be connecting up all the plumbing that you’ve already put in at the first fix stage. This will involve installing a variety of bathroom fixtures and fittings.
You’ll already have laid all the plumbing and electrical foundations for your appliances at the first fix stage. Some of the bathroom plumbing jobs you might have to carry out at the second fix stage include:
- Putting in a sink. A step-by-step guide is available in our basin installation section
- Putting in a bathtub. You can learn more about this on our bath installation page
- Installing a thermostatic shower. Find more information in our shower installation section
- Connecting radiators and boilers to the pipes already laid down for them at the first fix stage
-
Plumbing and heating supplies >
-
Plumbing supplies >
-
Plumbing tools >
-
Taps >
FAQs
-
What are the main pipework installation points?
The first fix pipework stage might require you to install shallow waste bath trap and basin waste, as well as new waste outlets for the sink. You may also put in a flow limiter valve for the shower at this point.
-
How much hot water does the bathroom need?
Five minutes spent in a typical shower requires roughly 45 litres of water, so from this you’ll be able to work out an estimate for how much hot water your client is likely to get though.
-
How will the plumbing system affect my plumbing?
Your choice of taps, shower valves and other bathroom fixtures and fittings will be affected by whether your client has a direct or an indirect plumbing system.
Whether your client has a low-pressure water system or a high-pressure one may limit their shower options, too. With a low-pressure system, a power shower with a strong flow might be unachievable.
-
When do I fit the flooring in a bath installation?
For a freestanding bath, lay the bathroom tiles underneath it first. Yet if your bathtub is closed in, you don’t need to tile this area.

-
How do I install a bath tub?
There are 6 key steps to follow when installing a bath.
- Assemble the bathtub’s legs
- Add in the other separate parts
- Position the bathtub
- Connect up the plumbing
- Secure the bath to the floor
- Attach the panels
Learn more about each step of the process >>>
-
Do I fit a shower before the bath?
Yes. If the bathtub is going to have a shower over it, this needs to be plumbed first.
Read more on bathtub installation.
Our supplier Abacus teamed up with Skill Builder to show you how…
-
How do I remove the bath?
Disconnect the waterpipes feeding the tap. If the bath isn’t free standing, get rid of the panel hiding the plumbing.
-
How do I remove the basin?
Ensure the water and electric is off. Have your colleague support the basin, as you unscrew the fittings. Use a suitable knife to cut silicone sealant or grouting away. Dispose of the basin.
To remove the pedestal, remove the sealant under the basin and near the bottom stand at the floor. Lift up the basin and slide the pedestal out. Put the sink back onto the wall bracket.